Swinging Tags
Posted: December 6, 2015 Filed under: 'Consultancy' | Tags: christmas, pine cone, print, tags, textiles Leave a commentAfter my presentation I have put more thought into my tags which are also a decoration. I thought about how there could be a swing tag attached to the tag. I have played with changing the scale and also a possibility of making them 3 Dimensional. The bottom tags would be attached to another tag which would slot into the top design.


Sheet Wrap
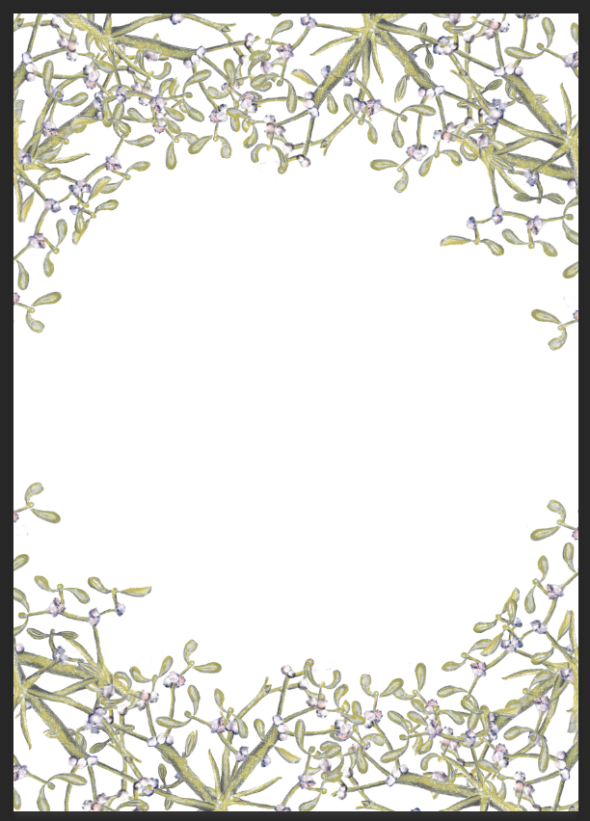
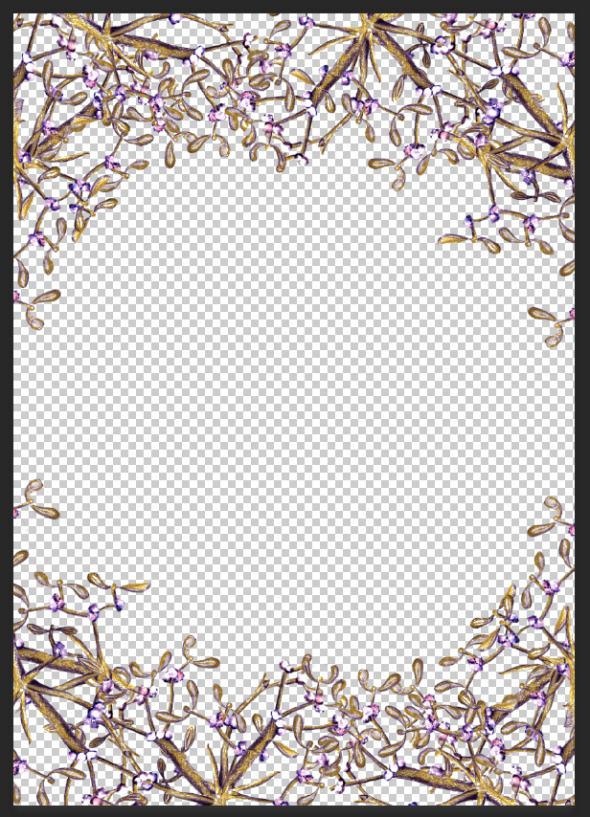
Posted: December 1, 2015 Filed under: 'Consultancy' | Tags: christmas, design, mistletoe, sheet wrap, textiles, wreath Leave a commentI have finally created my sheet wrap. It has been a bit of a struggle but I knew I wanted to use the mistletoe drawing and in quite a large print so that the details of the mark making was clear. I created a double layered mistletoe wreath for the centre then had the green pine cones dotted around the edge with ‘Merry Christmas’ type in between each pine cone. Then there was some larger mistletoe as a surround for the top and bottom. I used the red sparkly scanned mesh as the background.


Tags developed
Posted: November 30, 2015 Filed under: 'Consultancy' | Tags: christmas, design, pine cone, swingtag, tag, textiles Leave a commentAfter my tutorial with Helen I have adjusted my tag design so that it is less like a blob and has more of the pine cone’s jagged shape.

The ribbon will have a hand stitch of a golden thread on the edges to give it that little extra.
Bauble Struggles
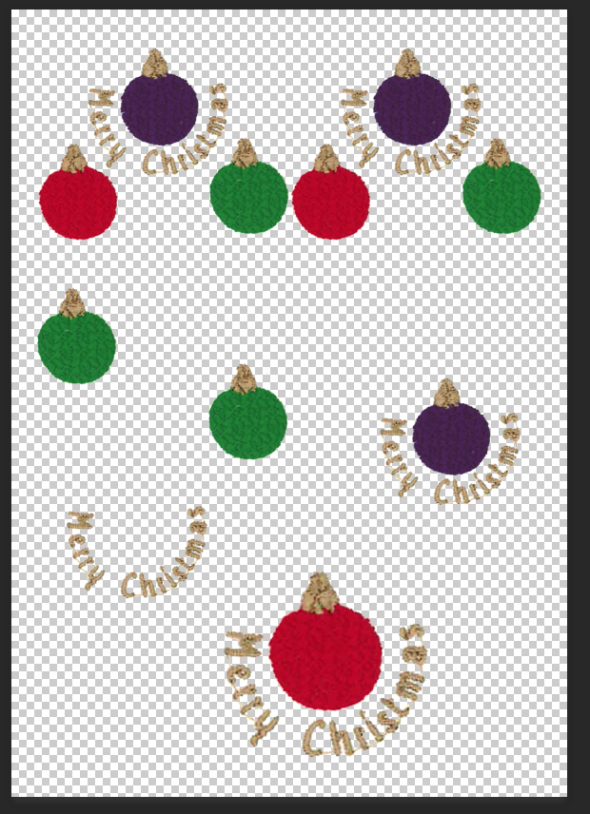
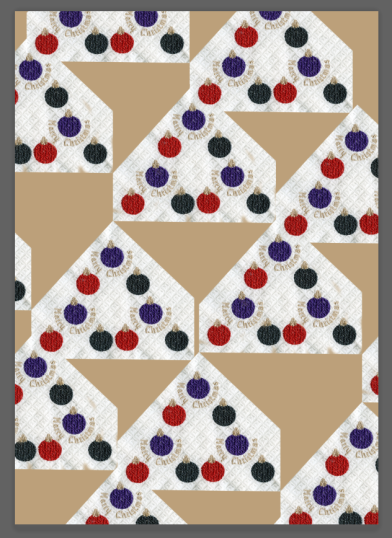
Posted: November 28, 2015 Filed under: 'Consultancy' | Tags: baubles, christmas, design, digital-stitch, pattern, textiles Leave a commentI have really tried to create a pattern using the digitally stitched samples I produced however each design seems too contemporary. I think Im going to have to treat the digital stitch samples as just examples of my experimentation as sadly I don’t feel they fit well with the rest of my collection. They are after all man made products which don’t sit well with my other imagery which is all very natural.


Also due to the size if I try to enlarge the baubles and the text of ‘merry christmas’ it becomes too blurry and the stitches are unidentifiable.
A little Extra
Posted: November 27, 2015 Filed under: 'Consultancy' | Tags: christmas, design, pattern, textiles Leave a commentI decided I wanted to create two final roll designs since my cards are of two colour ways I wanted to show there could be two for the roll wrap too.
I really wanted to use the mistletoe from my sketchbook so have created it into a wreath design. Then I have used the holly in a spiral shape and used stripes of plum and a deep red to break up the design. Then I have dotted ‘Merry Christmas’ throughout some of the holly spirals.

Tags
Posted: November 24, 2015 Filed under: 'Consultancy' | Tags: christmas, design, pine cone, present, print, swingtag, textiles Leave a commentI have known for a while that I will use my pine cone screen print to inspire my tag design. I have decided the pine cone print will be on the scanned foil mesh (background). For a while I did toy with the idea of making the pine cone sit off the background which would show a difference in depth and placement however due to the tag being quite small I would lose a lot of the smaller sections of the pine cone.
Instead I will print the pine cone onto the gold background but there will be three different coloured tags. The ribbon will match the colour of the pine cone, red, plum and green will be colours used. The idea is that they will be sold as a multipack. The back where the customer can write will just be plain gold mesh.
There will be an outline of the colour too around the pine cone.

Bauble Tree
Posted: November 16, 2015 Filed under: 'Consultancy', Uncategorized | Tags: christmas, digital-stitch, pattern, photoshop, stitch, textiles Leave a commentToday I used the digital stitch programme and machine to stitch out my bauble design. I wasn’t sure whether I should stitch it out or not but am glad I did as it has opened up possible design ideas for my products.
It was originally a larger more repeated design but I kept just one set of the design to stitch as then I can repeat it digitally once scanned in. It took about half an hour to stitch just the 9 baubles and typography so it was a good thing I removed the rest of the design otherwise I would have been there all day waiting for it to stitch out. The design would have also been a lot smaller – each bauble about 1cm in diameter – so it would not have been very clear and the writing most likely unreadable.

I was really pleased with how the stitch design turned out and have already been experimenting with the design on photoshop. I think it is useful to try out different patterns even if I am not going to use them as it makes it clearer to myself of what works and what doesn’t.


Printing Day
Posted: November 6, 2015 Filed under: 'Consultancy' | Tags: christmas, foiling, image transfer, pattern, textiles Leave a commentToday I printed using the screen I made up a few weeks ago. I wasn’t expecting them all to be perfect as Steve and I had previously discussed how the lines may be too thin in areas but he gave me lots of different fabrics to experiment and practice on.
I decided to try out foiling first so did quite a few samples of this. Some were more effective than others and I particularly love the pine cone ones. Steve showed me the many different colours of foil he had in stock so I picked to try out a couple of different ones.


Gold foil I think was the most effective which is good as its one my colours on my colour board. I will work into some of these in stitch as well as on photoshop.
I then cleaned my screen and used pigment to screen print the images again. I tried to create a deep plum colour but once it had dried it came across as more of a brown colour. However this isn’t a problem if I digitally manipulate it as I can alter the tone of it.


these have been printed on two different fabrics. A synthetic textured piece (left) and a piece of calico (right).
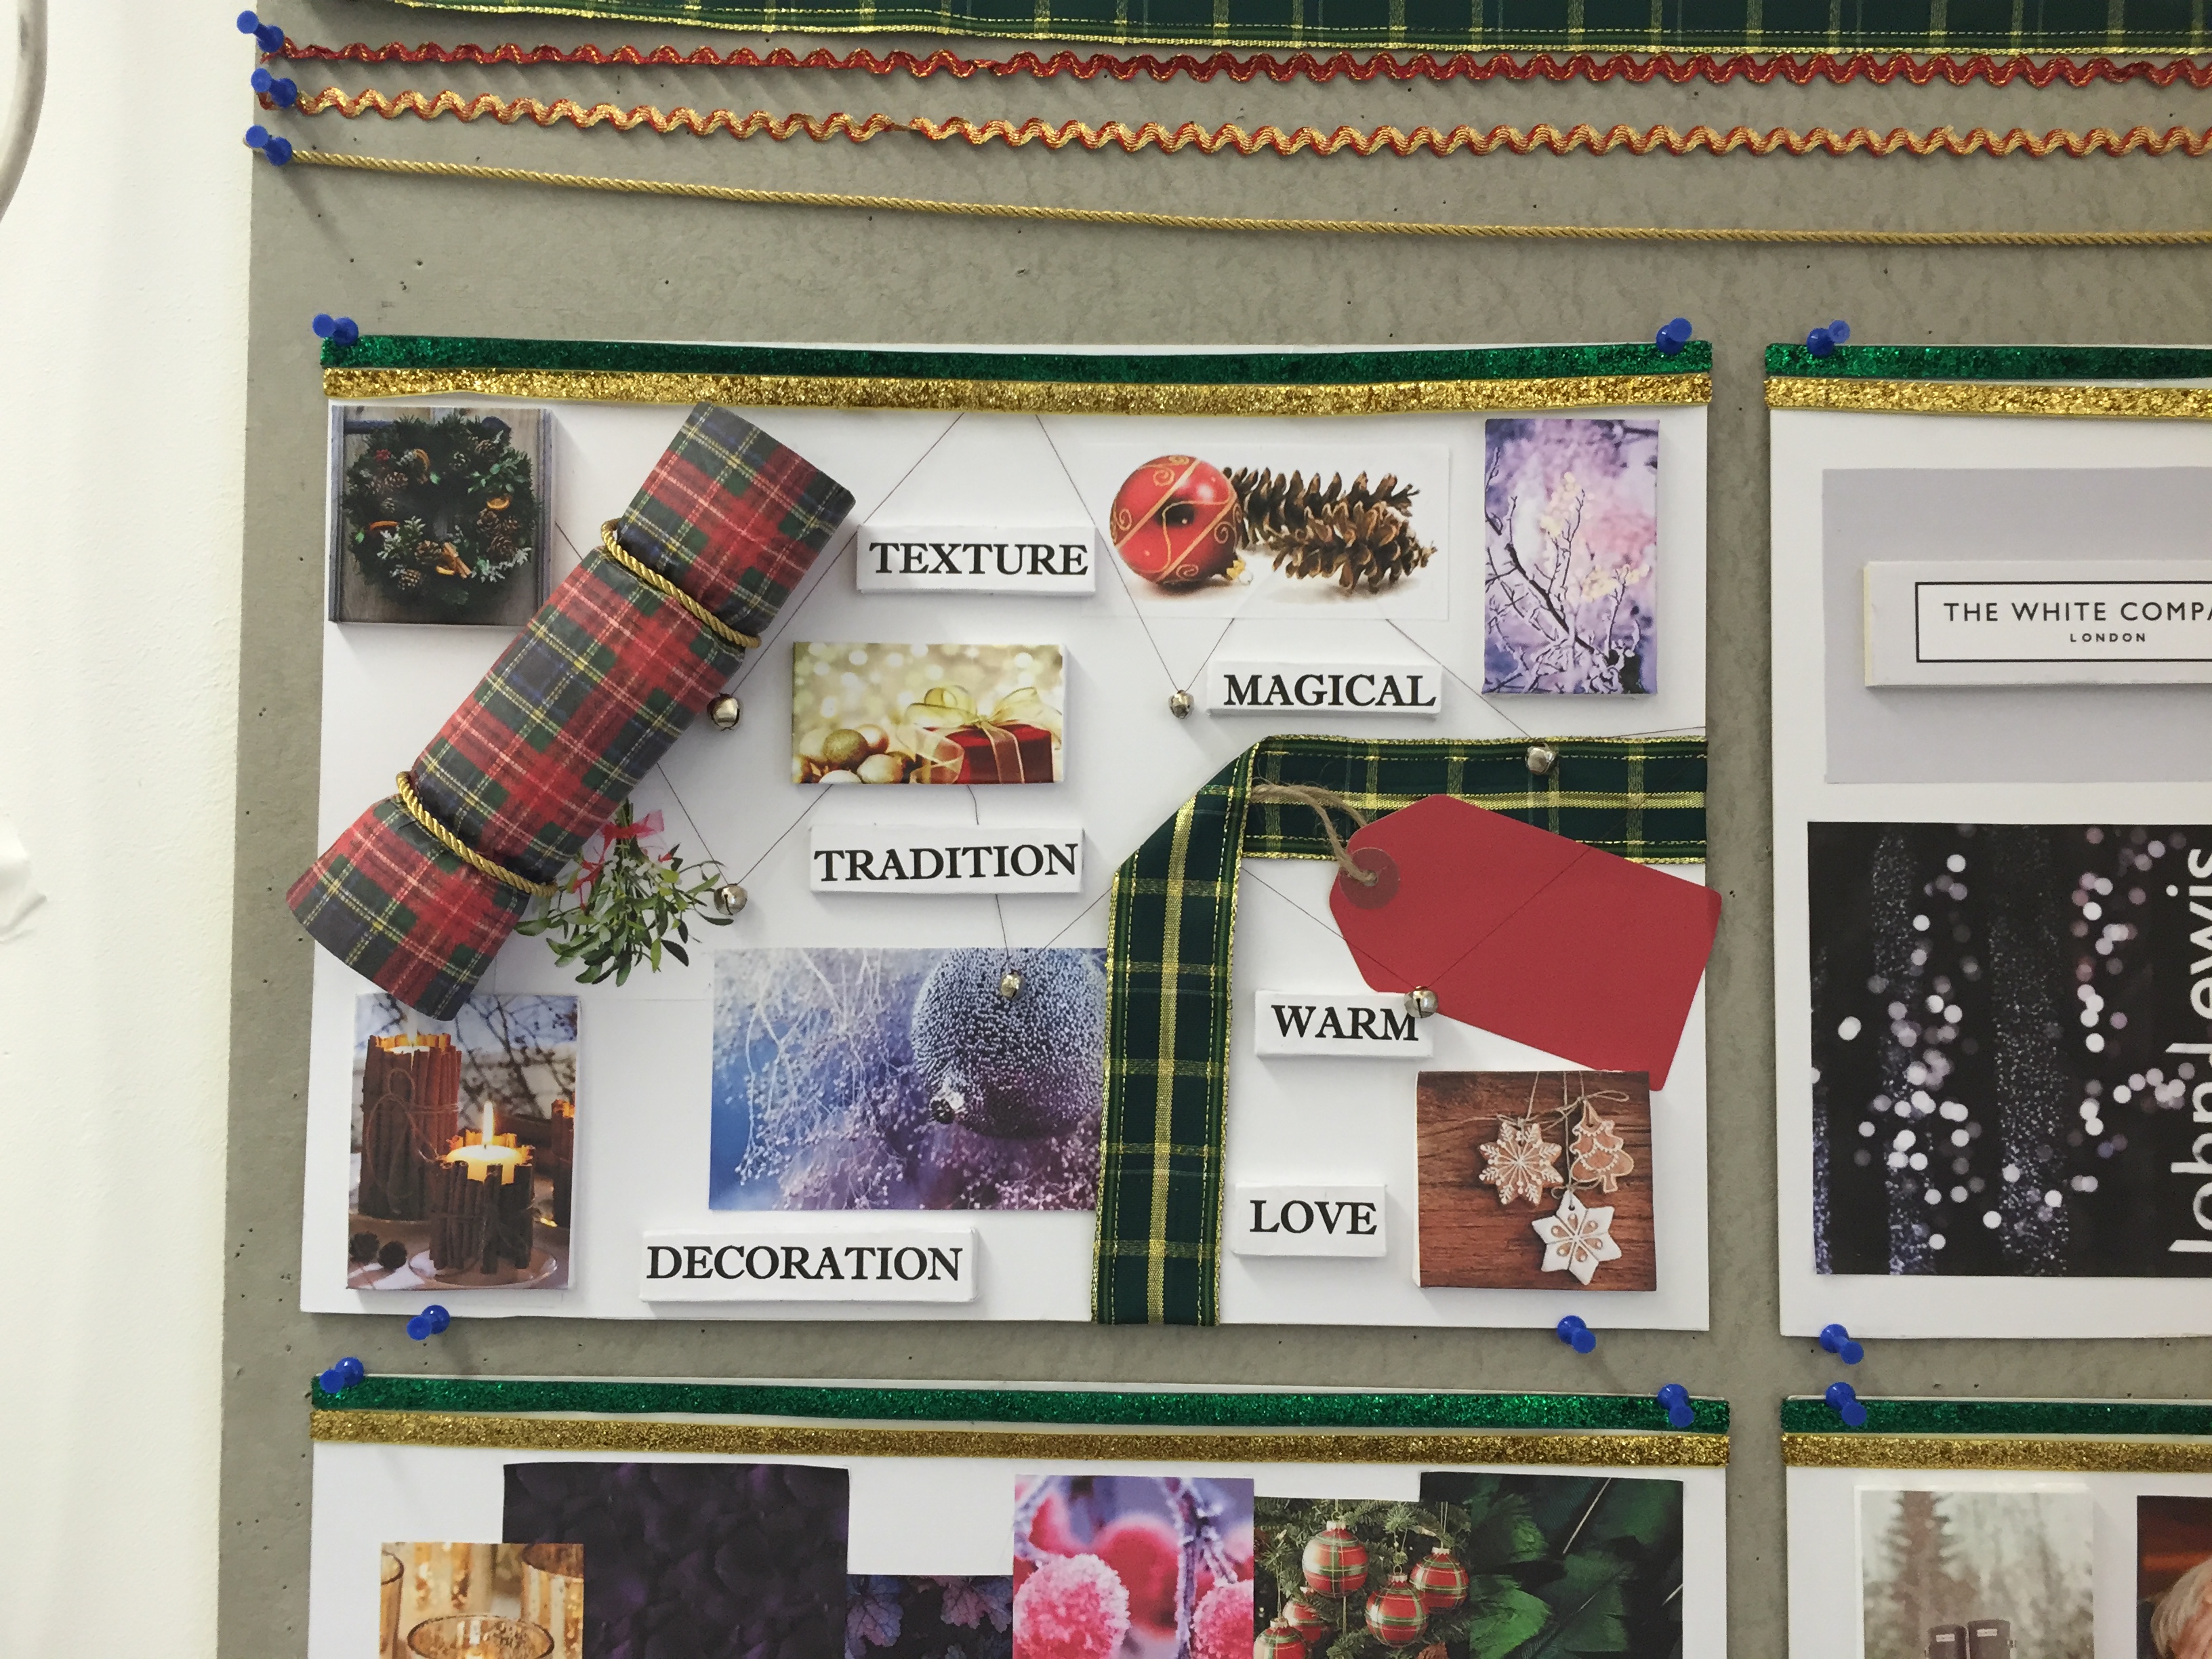
Development of Mood Boards
Posted: October 15, 2015 Filed under: 'Consultancy' | Tags: design, ideas, inspiration, moodboard, textiles Leave a commentMy mood boards feel like they have taken me ages to produce but I think because I have started one and then started another then gone back to finish the first started it has dragged it out a bit. I have struggled the most with my client board as I have found it hard to picture exactly who my target market it. At first i thought my target market was a youngish newly wed female who was hosting her first christmas so wanted everything to be perfect for her family and in-laws. However the more I thought about this I have decided that my target market will more likely be a middle aged mother and family orientated women possibly in the early stages of being a grandmother or perhaps has older teenagers – young adults and has a bit more expendable money.
I think I have finalised my mood boards so I mounted them onto card and used foam board for certain images to raise them which creates depth.


internship at Gyunel
Posted: November 16, 2014 Filed under: ADZ5888 Field | Tags: gyunel, internship, placement, textiles Leave a commentTomorrow i start my four weeks internship at Gyunel, a design company based in South Kensington.
I am both excited and nervous as Im not really sure what I will be doing except for in my interview I explained how I have been taught basic skills in photoshop and illustrator. There is a possibility I will move around the different sections of the design process however I would be very content just perfecting skills on the computer programmes.
They concentrate on couture and catwalk fashion which will be interesting to learn about as I haven’t seen much of how that side of the fashion and textiles industry works.

Recent Comments